I have a Windows Seven ISO in hard disk.
Do it is possible to install it from hard disk with grub4dos?
I'm not able to a clear howtodo.
I have a Windows Seven ISO in hard disk.
Do it is possible to install it from hard disk with grub4dos?
I'm not able to a clear howtodo.
Just double-checked, that it is not my code problem. I see it on both 1.8.x and 1.9.4.
When I mount something like this as a disk:
using (var stream = new MemoryStream(checked((int)size)))
using (var provider = new DevioProviderFromStream(stream, ownsStream: false))
using (var service = new DevioShmService(provider, OwnsProvider: false))
{
  service.StartServiceThreadAndMountImDisk(ImDiskFlags.Auto, mountPoint);
  wait for key...
}
Then format disk, and try to write to a file on it with FILE_FLAG_NO_BUFFERING option set (file already exists, and has non-zero size by the time I do that). It always fails, complaining about something like System.ArgumentException: Handle does not support synchronous operations, which deep inside appears to be unaligned access, just like in this topic: http://reboot.pro/topic/4112-imdisk-proxy-type-mount-cant-work-with-winhex/?hl=file_flag_no_buffering
The same test with FILE_FLAG_NO_BUFFERING works perfectly on real disks, and ImDisk-mounted disks, mounted directly (e.g. not via proxy).
This problem appears on the very first write, where I try to write 1MiB of data at file offset 0, so I assume alignment should not be a problem.
Hi
I have created a bootable external Hdd with WinFE image and added a disk hash software utility in it. While testing,I found that the speed of this hash utility running in normal windows platform is higher than in Windows FE environment(Same machine). Why this happen?
Is there any method to improve the speed of this utility? do I have to add/ set any cab/parameters to WinPE image to increase the execution speed of the added tools ?
graphicsmode 0x6AThis results in a tiny little unreadable line on the top of the screen on a typically troublesome Dell Latitude E6400.
## set vbe mode

graphicsmode -1 640 480:800
This works fine on that laptop. Now can use longer lines in menu titles, thanks.
Over $50 in Paid Apps & Games FREE
Offer ends July 1, 2015 11:59PM PDT.
I want to creat USB Kaspersky Rescue but it was broken.
Code menu.lst
Hi every body,
I installed windows 7 on my HDD and then install OpenBSD to a free partition of my HDD.
Now, I can boot only to Windows 7.
I did the steps of http://cromwell-intl.com/linux/multiboot-windows-openbsd/but nothing changed and I can not boot to my OpenBSD by bcdedit.
Also when I boot from a live cd I can boot forward to my OpenBSD but I want to create a boot menu to select which OS booting.
So, Which tools can install on my HDD to perform the boot selection menu?
Thanks.
Hi everybody,
here you can find the current information about my "PENetwork"-manager project - primary for LiveXP and Win7PE systems.
The current version you can always download from 'my' personal WinBuilder-website (http://holger.winbuilder.net).
At the moment the most time I'm writing on PENM itself.
However, some older WinBuilder scripts for LiveXP and VistaPE you can still find there.
If you have any questions, suggestions or problems just let me know.
Tested by others and me with Win7 / Vista / XP / W2K3-source and VMWare / VirtualBox / QEmu / RealWorld - thank you all very much 
Greets...
Holger
Current state:
31.01.2014 (PENM 0.58.2):
- Changed: Recompiled with AutoIt3.3.0.0 to better work with virus scanners
No functional change!
08.10.2013 (PENM v0.58.1):
- Fixed: GUIDisable mask option missing
07.10.2013 (PENM v0.58):
- Fixed: Missing translation applying after language change for connect menuitem in network browser
- Fixed: After saving new color scheme in profile editor it was not applied to the list of the existing schemes
- Fixed: Window focus on profile deleting in profile editor
- Fixed: Profile deleting in profile editor
- Fixed: Wrong label length calculation in network startup dialog
- Fixed: IP address was not deleted if last item in network browser window was removed
- Fixed: Missing color scheme apply on checkboxes if Windows styles are enabled
- Changed: Profile editor reworked
- Changed: Detailed PE version in debug log
- Changed: Position of tray info window now near the tray icon
- Added: Cmdline parameters /ini= for loading a specified ini file
- Added: Cmdline parameters /profile= for loading a specified profile directly from file
- Added: 'GUIDisable' mask parameter (ini, reg, cmdline) to show only some specific tabs ("Config"/"IP" & "About" are always shown)
- Added: Version infos for WIN_8.1/WIN_2012R2 (WinPE5.0)
- Added: Icon for AC wireless networks in available wireless networks
- Added: More ini options are changable via profile editor
- Added: Simple preview window in profile editor
- Added: Simple check for entered addresses (IP, SM, DG, DNS, WINS) in profile editor
- Added: Simple check for entered MAC address
- Added: Some more visible options to color schemes tab in profile editor
- Added: Key accelerators for profile editor
- Added: Tooltip for profiles file cause file path can be larger to display
- Added: Frame color for diabled buttons now changable via schemes/profile editor
Note!: network browsing doesn't work in QEMU by default cause of the buildin firewall
History:
Latest version:

Dark color scheme: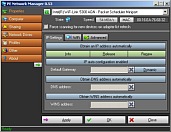
Boosted Board - Electric Skateboard hitting 22mph ($1000+)
launched it Kickstarter
http://shop.boostedboards.com/collections/boosted-boards
Overview
http://techcrunch.com/2014/11/06/electric-skateboards/
Closer look
================================================================================
*** IMG_XP package ***
Make XP and Win7 Universal Image files booting with Grub4dos Menu on HDD or USB
Download - IMG_XP_85 - mirror
In Win7 OS Set User Account Control Off and Reboot
First Prepare XP Setup ISO file with integrated UpdatePack and DriverPacks as described below in section 2.
and Copy XP Setup ISO file to the root of internal harddisk drive of your computer.
1. VHD_XP_Create.exe - Make VHD file and Install XP in VHD by using Grub4dos Boot Menu on HDD
0. Run IMG_XP.exe and Extract to simple path on your Local Harddisk - gives folder IMG_XP
1. Use IMX_XPmakebtimdiskinst.exe to Install ImDisk driver (if not present)
- Imdisk is used by USB_XP_Fix.exe to mount VHD and HDD Image files in a virtual drive
2. Run VHD_XP_Create.exe to create XP-1.vhd and Grub4dos Boot Menu for Install of XP in VHD
- XP-1.vhd has already NTFS compressed format, so you should NOT format at Setup, just keep settings
- Format XP-1.img inside XP Setup cannot be used, it results in corrupt message
4. After Reboot select Continue XP Setup and then Reboot to Start XP from Image XP-1.vhd
5. Reduce size and improve settings as usual and Install missing Drivers but NOT the specific large Video driver
- Reduce size to get rid of pagefile.sys and hiberfil.sys via:
- right click My Computer > select Properties > Advanced > Change Virtual memory > select No pagefile and Set
- right click on Desktop > Screen Protection > Energy > Uncheck Sleep settings to get rid of hiberfil.sys
- Set System Restore and Windows Update Off and delete 350 MB of dllcache folder via cmd SFC /purgecache (or Run PURGE_DLLCACHE.BAT)
- In Device Manager Install missing Drivers but NOT the specific large Video driver
- For Universal XP don't Install the Video driver. You can Uninstall the Video driver so that you still have high resolution on any hardware.
- Set Screen Resolution to 1024 x 768 useful on all monitors (right click on Desktop)
7. Connect USB-HDD where you want to use XP Image, so that USB-HDD settings are known in XP registry, and Reboot
8. Reboot with other OS and copy XP-1.vhd to bootable USB-drive and create entry in Grub4dos menu.lst
- BOOT_USB.exe can be used to make USB-drive bootable with Grub4dos Menu - http://www.911cd.net...showtopic=24424
- BOOT_IMG.exe can be used to make Grub4dos Boot Menu on existing bootable drives
9. Run USB_XP_Fix.exe and Select your XP-1.vhd file on USB-drive and click GO
10. Reboot from USB on the same computer and Select Boot XP Image - XP-1.vhd - WinVBlock FILEDISK
11. Reboot from USB on other computers and Select Boot XP Image - XP-1.vhd - WinVBlock FILEDISK - to make Universal
When booting on other unknown machine, then XP will auto adjust itself in about 3 min and install the required drivers.
In this learning process, the registry gets extra info on how to boot on that machine and will use it next time and so XP becomes Universal.
This process requires that you have the WINDOWS\DriverPacks folder of 135 MB available with Chipset + Processor + MassStorage + LAN drivers
and that DevicePath in the registry was properly set by the Keep The Drivers Option KTD (see below and in Picture).
Thanks to Sha0 for making WinVBlock driver - http://reboot.pro/8168/
Thanks to cdob for making usb_xp_init.cmd - http://www.911cd.net...o...22473&st=37
Thanks to sara - pmedia for her tutorial - http://reboot.pro/13731/
More Info on direct Install of XP by using grub4dos menu and WinVBlock or FiraDisk driver:
cdob - Install XP from a ISO file No RAM disk - http://www.msfn.org/...rom-a-iso-file/
Doodoo - http://reboot.pro/13...385#entry122385
sara - pnedia - http://reboot.pro/13731/
wimb - http://www.911cd.net...showtopic=23553
karyonix - http://reboot.pro/88...737#entry121737
karyonix - http://reboot.pro/13967/
In case of a hidden boot partition containing Boot folder and file bootmgr of Windows 7,
Grub4dos Menu for Install of XP in VHD by using XP Setup ISO file and WinVBlock driver
title Continue GUI-mode XP Setup on XP-1.vhd - WinVBlock driver - 2000 MBfind --set-root --ignore-floppies /XP3_1210W.isomap --mem /XP3_1210W.iso (0xff)find --set-root --ignore-floppies /XP-1.vhdmap --mem /winvblock.ima (fd1)map --mem /winvblock.ima (fd0)map /XP-1.vhd (hd0)map --hookroot (hd0,0)chainloader /ntldrtitle Start - TXT-mode XP Setup on XP-1.vhd - WinVBlock driver - 2000 MBfind --set-root --ignore-floppies /XP3_1210W.isomap --mem /XP3_1210W.iso (0xff)find --set-root --ignore-floppies /XP-1.vhdmap --mem /winvblock.ima (fd1)map --mem /winvblock.ima (fd0)map /XP-1.vhd (hd0)map --hookchainloader (0xff)title Boot Windows XP from Image - XP-1.vhd - WinVBlock driver - 2000 MBfind --set-root --ignore-floppies /XP-1.vhdmap /XP-1.vhd (hd0)map --hookroot (hd0,0)chainloader /ntldr
After Install of XP then you need to fix XP-1.vhd for booting from USB-drive by using USB_XP_Fix.exe
The fix will prevent BSOD 7B and will help to allow the XP VHD to boot on various hardware and so become Universal.
menu.lst on USB drive
title XP-2.vhd - WinVBlock FILEDISK - 2000 MB
# Sector-mapped disk
map /XP-2.vhd (hd0)
map --hook
root (hd0,0)
chainloader /ntldr

title XP-2.vhd - WinVBlock RAMDISK - 2000 MB
# Sector-mapped disk
map --mem /XP-2.vhd (hd0)
map --hook
root (hd0,0)
chainloader /ntldr

================================================================================
WindowsXP-KB936929-SP3-x86-ENU.exe /integrate:E:\XPSOURCE
[SetupParams]
UserExecute = "%SystemDrive%\INSTALL\SetupPar.cmd"
DevPath.exe %SystemDrive%\D
title Portable Win7-1.vhd - FiraDisk FILEDISK - 2.0 GBmap --heads=2 --sectors-per-track=18 --mem (md)0x800+4 (99)map /Win7-1.vhd (hd0)map --hookwrite (99) [FiraDisk]\nStartOptions=disk,vmem=find:/Win7-1.vhd,boot;\n\0rootnoverify (hd0,0)chainloader /bootmgrmap --statuspause Press any key . . .title Port Win7-1.vhd - FiraDisk RAMDISK - 2.0 GBfind --set-root --ignore-floppies /Win7-1.vhdmap --mem /Win7-1.vhd (hd0)map --hookroot (hd0,0)chainloader /bootmgr
More Info see http://www.911cd.net/forums//index.php?showtopic=23553
4. Universal Image Compact and Restore - Details
5. Solutions to prevent BSOD 7B - Run USB_XP_Fix.exe
6. Universal XP - Support in boot.ini menu for Multiple Hal and Kernel
================================================================================
- Win_Restore.exe can be used to Restore XP or Win7 from VHD to HDD-partition.
For Restore of Win7 from VHD you need to run Win_Restore.exe in Win 7/8/7PE OS
so that bcdboot.exe can be used to generate Boot Manager Menu required to boot Win 7 from HDD-partition.
- BOOT_IMG makes GRUB4DOS Menu on Target Boot Drive for selected VHD File on NTFS Target System Drive (copy occurs if needed).
In general ImDisk must be installed in XP or Win 7/8 by using previously the provided imdiskinst.exe file.
ImDisk is used to mount VHD Image file in a virtual drive.
To Install ImDisk driver on Vista and Windows 7/8 you need to turn off UAC, User Account Control
http://www.ltr-data.se/opencode.html
The 64-bit FiraDisk driver requires in x64 Win7 to set testsigning switched on.
Open Command Prompt as Administrator:
bcdedit /set testsigning on
Reboot to activate this. Info here http://msdn.microsof...y/dd419910.aspx
Thanks to karyonix, more Info see:
FiraDisk - http://reboot.pro/index.php?showtopic=8804
Install FiraDisk driver in XP with R-mouse on firadisk.inf in IMG_XP\makebt\firadisk-driver- folder
Development and historical thread here:
Thanks to joakim for starting the subject
http://reboot.pro/index.php?showtopic=9227
Hello Everyone,
I'm pretty new with the Windows Embedded & installing windows from USB.
I'm trying to install Windows Embedded Standard 7 SP1 on Panasonic CF-53 laptop.
I've plugged my USB and made a bootable USB using rufus (https://rufus.akeo.ie/) and this ISO:
en_windows_embedded_standard_7_sp1_runtime_x64_dvd_651894.iso
When I've booted from the usb > Clicked "Build an Image", I get the following error message:
"A required CD\DVD drive device driver is missing".
So I've downloaded the Win PE x64 & x86 drivers from Panasonic's website:

And then used Microsoft's KB to add additional drivers to the boot.wim file:0
https://technet.microsoft.com/en-us/library/dd799289%28v=ws.10%29.aspx?f=255&MSPPError=-2147217396
Then I've replaced the boot.wim file (under the sources folder) in the bootable USB I've created with Rufus.
I've tried this procedure with x86 and x64 but I still get the "Load driver" message box.
What am I doing wrong?
I'll be very thankful for your assistance, thank you!
David.
What happens when you mix the Wizard of Oz and Avengers? maybe something like this.
I would watch it.
I am trying to download an approx 100GB megatorrent, consisting of rare/old/specialty occult materials. It is mostly ebooks, along with some videos and photos. The intent is to get and keep it available and shared between me and others of a like mind. All of the files are already available for free legally, or are out of copyright/in the public domain. However, the people who originally compiled these torrents saved some of the files with characters like :, ;, etc. Windows cant have these characters in filenames. Utorrent complains that quite a few of the files either cant be downloaded/written to disk due to this, or says that some arent accessible.
We have decided that it will be necessary to save these files in a filesystem that is more robust than NTFS, and allows for these characters. Said FS needs to be shareable between Windows/Linux. File permissions are of no concern, but I think that NTFS, FAT32, and exFAT simply wont be suitable. A few of us use Linux, with varying degrees of familiarity with said OS. I'm that maybe EXT4 would be the best FS to use. There is a driver called EXT2Fsd, that allows both read/write access to EXT4 volumes in Windows.
A few possibilities I'm thinking might work (but not sure) are:
1. Create an encrypted container in TrueCrypt/VeraCrypt (TC clone/fork but with improvements), format as ext4, then mount the container with a drive letter/mountpoint, and instruct our torrent clients to save the files there. However,this adds unnecessary encryption overhead.
2. Create a raw disk image, like a VHD, then create a 100GB partition within the VHD and format it as ext4. This can then be shared between both OSes.The files within can be renamed/moved to mert Windows filename standards, which Linux/OS X/Android have no issues with. Afterwards the collection can be recompiled and publicly distributed. The disk image can also be easily cloned, checksummed, and split into smaller chunks for distribution.
Ia there a better disk image type than VHD for this purpose? Perhaps there is a different and more common filesystem that meets our standards? Are encrypted containere feasible or simply too much effort? We will also need to use common/standard/free tools that arent overly complex.
Any ideas/suggestions are appreciated...........
/tftpboot/

/tftpboot/pxelinux.cfg/

/tftpboot/pxelinux.cfg/default

/tftpboot/memdisk

/tftpboot/RamXP.HDD
/tftpboot/pxelinux.cfg/default file:
DEFAULT ramxp

LABEL ramxp

  KERNEL memdisk

  APPEND raw

  INITRD RamXP.HDD
/menu.lst

/RamXP.HDD
MENU.LST file:
default 0


title RamXP

  map --mem (hd0,0)/RamXP.HDD (hd0)

  map --hook

  root (hd0,0)

  chainloader /ntldr
...

[SCSI.Load]

wvblk32 = wvblk32.sys,4

...
I have spent some time reading around this forum but I need some help. Be patient I am new and trying here. I hope Steve6375 finds this post because his brains would come in handy about now. There are many great folks here and I readily admit I am a newbie. In fact I am using a "fossil" grub4dos but it is working great.
This is not just another TrueCrypt thread. I am currently using grub4dos on a bootable usb as needed. I mount 7 Pro as a normal unencrypted system disk and a hidden encrypted 7 OS on half my machines using grub4dos. On these machines I remove the TrueCrypt bootloader and run an unencrypted 7 OS in sda1. I use a grub4dos bootable usb to mount the hidden OS when needed -- its in sda2. Its basic stuff really but I'll paste here for reference:
title TRUECRYPT RESCUE DISK
find --set-root /tc.iso
map --mem /tc.iso (hd32)
map (hd0) (hd1)
map (hd1) (hd0)
map --hook
root (hd32)
chainloader (hd32)
I have used and helped scores of folks with TrueCrypt and now I want to take this to another level. I made a sector by sector image of sda2. I have acid tested the image by destroying sda2 in the original location and then replacing it with the saved image. It works perfectly so its ready to go and accurate.
My project: is to redeploy the sda2 image to somewhere else on the disk better concealing the fact that there is a hidden OS in play. Then I can overwrite the current sda2 and put something else in its place. The TC code goes to the following address to find the hidden OS: For system encryption, bytes 65536–66047 of the first partition located behind the active partition* are read into RAM. Since my image is exact when I redeploy it the header address will be the same (65536-66047). By not changing the original size of the normal system disk, the cloned hidden OS will match size with the original donor, meeting many of the TC parameters so it should pass any crc tests.
Using Grub4dos how can I either hide,make active/inactive, etc so that when the grub4dos usb is booting it will completely ignore sda2 and look at sda3 instead? (sda3 is an example so lets use it). I don't need TC to see anything other than sda3 in this example and ignore sda2 completely. Maybe a command line structure could make TC think that sda3 is sda2 (re-map?). I am open to any combination that would accomplish this task. In a perfect world this use of grub4dos won't change a single byte on the actual hard disk leaving no forensic loose ends!
From reading here I know that windows tends to find hidden partitions, but I am hoping that using grub4dos on a bootable usb, will allow me to hide them long enough to mount the hidden OS as positioned in my example above. I don't think this method will mess with the partition table since all three partitions already exist on my drive and its working fine now.
I could really use some help here. Thanks.
CDRWIN 10 (100% Discount) Free
http://www.windowsdeal.com/w/cdrwin-10-discount-coupon-code/
CDRWIN 10 is concentrated and proven burning power for your CD-, DVD- and / or Blu-ray-writer with a new and modern interface, which offers the most important functions quickly and clearly arranged.
Equipped with a state-of-the-art technology, CDRWin 10 is providing those qualities, which already made the predecessors very successful: reliability, velocity, comprehensive functionality and a straightforwardness that directly leads to success.
Get now with CDRWIN 10 an ideal burning software package for starters and professionals. Now also compatible with Windows 8.
Features:
- Direct copy of data-CDs/DVDs (incl. computer games) and audio-CDs
- Burning and creation of ISO-, BIN- and XMD-images as well as Cue-Files
- Authoring of Orange Book-compatible data-CDs (CD-ROM, CD-ROM/XA) as well as data-DVDs and Blu-ray discs. Also suitable for creation of MP3- and h.264/MPEG-4-CDs/ DVDs & Blu-ray discs
- Automatic setting of the platform-overlapping ISO 9660-file system and the Windows Joliet file system for display of long file names and complex directory structures
- Authoring of Red Book-compatible audio-CDs (CD-DA) in Disc-at-Once-mode with manually adjustable track breaks and CD-Text
- Support of Disc at Once (very important, e.g. for standard-compliant creation of audio-CDs and when copying from CDs/DVDs), Track at Once (important in case data-CDs are to be extended retroactively) and Session at Once (CD-extra)
- Ripping of audio-CDs in MP3/WMA or WAV. Supports the reading of CD-Text, freedb.org and the manual input of title information
- UDF support for burning DVD structures
- freedb-data can be edited and are stored locally in a cache
- Fast or complete deletion of re-writable media
- Caching system for optimization of system configuration and guarantee of safe burning procedure
- Multi-Session support for data discs
- Support of all known blank CD sizes from 21 to 99 minutes length, CD-R, CD-RW, DVD+R, DVD-R, DVD+RW, DVD-RW, DVD DL, DVD-RAM, BD-R and BD-RW. Overburning of CD-Rs is also possible.
- Support of various techniques for buffer underrun protection, e.g. BurnProof
- Audio- and data projects can be stored and loaded
- Retroactive finalizing of CD/DVDs/Blu-ray discs possible
- Future-proof: automatic support for new burners. More than 1000 burners tested successfully, among others Acer, ACTIMA, AOpen, APACHI, ARTEC, ASUS, BTC, Compaq, CenDyne (Verbatim), Creative Labs, Cyberdrive, CyQ’ve, Delta, DynaTec, Dysan, Freecom, Fujitsu Siemens, Goldstar, Grundig, Hewlett-Packard (HP), Hightech, Hi-Val, Imation, Iomega, JVC, Kodak, LaCie, LG, Lifetec, Lite-On, Media FORM, Medion, Memorex, Mem-Up, Micro Solutions, Microboards of America, MicroNet Technology, Mitsubishi, Mitsumi, Mustek, Nec, Olympus, Optima, OTI, Pacific Digital, Panasonic (Matsushita), Philips, Pinnacle, Pioneer, Plasmon, Plextor, Procom Technology, QPS, R-Quest, Ricoh, Samsung, Sanyo, Smart & Friendly, Sony, Taiyo Yuden, TDK, Teac, Terratec, Tevion; That’s write, Toshiba, Traxdata, Turtle Beach, Waitec, Wearnes, Yamaha and more
- Supports ATAPI-, SCSI-, SATA-, Firewire- and USB-drives
- Includes an ASPI driver for Windows
- Incl. ATIP and ADIP-display
- Incl. sector viewer of discs
- Support for Drag & Drop
I'm trying to integrate Java, Directx and all of the visual basic redistributes to the WinPE project
I see that there is already integration for .NET framework so that is taken care of.
Is there a way to do this without installing it on a already live version of WinPE 8 and then capturing the changes?
What I want to do is, boot up WinPE and be able to run anything on the system with all those tools installed, and not
get any (fatal error messages. For example if there is a system that is infected, I can pop in my winPE USB and be able to run the system and programs on it without any hassle. Instead of getting a side by side configuration is incorrect error.
Hope I"m making sense
Thanks in advance
You rock!
I've been having issues with my laptop recently, and have decided that it would be best to just reflash an unlocked BIOS, then restore from recovery discs. I made clones of my friend's recovery discs, they're pretty much unscratched so I'm sure they'll work. And we have identical model laptops. But I've been having trouble making a bootable OEM recovery USB from the ISOs, I already tried once and the USB failed to boot, just got stuck on a blinking cursor. Using Dell's AlienRespawn utility failed, it wouldn't install because I dont have a factory recovery partition present on my SSD/HDD. I cant install using the actual discs because I no longer have a disc drive. I noted that in a subfolder on each disc there are 2 WIM files, BASE.WIM and BASE2.WIM. I know how to apply a single WIM file with ImageX, as well as split WIMs (*.SWM), but not 2 WIMs. Can anyone tell me what the command syntax is for applying 2 WIMs?
Currently I've tried:
imagex /apply F:\preload\BASE.WIM /ref F:\preload\BASE2.WIM 1 J:
But I'm not sure if it's actually applying *BOTH* WIMs.
Thanks!
EDIT: BASE.WIM appears to contain what should be the contents of C:\, but BASE2.WIM is around 2.5GB and only contains a [2].xml file and a [Files] folder with a gazillion files within that that are essentially nothing but a bunch of files with numberss in their names. Surely the data must be important for restoring.
EDIT #2:
I get the message "Image successfully applied" when using the command listed above, so I still can't be sure whether the BASE2.WIM is also being applied.
 )
)


 I guess I'll have to search on searching to find out what I'm doing incorrectly.