Quantcast
Channel: Reboot.pro
Viewing all 6812 articles
Browse latest View live

Multibooting W2k/XP strange ways with grub4dos

$
0
0

Do I need to install Windows XP and/or Windows 2000 to the first primary partition, or is it possible to install it to eg. the second primary so, that when the first primary is hidden, all the boot and system files will be placed to the same partition (eg. second primary)?


So I don't want to divide those boot and system files between P1 and P2 (being first and second primary), and I don't want to use the first primary. The P1 would be hidden or possibly even partition ID changed to gnu hurd type or something, that W2k/XP don't recognize, if needed.


I'm asking this, because the above is the way I have done my multiboot systems with W7/W8/W10 - using small P1 for grub4dos. However, when I once installed XP to an old computer, I put it to P1, generalized the BCD and used the image for cloning it to another partitions. So I put the grub4dos files to the P1 with the original XP installation. I did it because at least at the time, I thought XP was impossible to install straight to P2 (so that all the boot and system files would be there at P2 too, for easy generalizing & imaging & restoring to other partitions).


Now I'm planning to use another old computer for W2000/(possibly XP too)/linux multiboot system, because an old game needs W2k, so if I can install W2k/XP straight to P2 and P2, using P1 only for grub4dos files, it would be less hassle.


Another question: I don't necessarily need to clone W2k/XP images to logical partitions (that I did with W7/W8W10), but is it possible to boot W2k/XP from logical partitions so, that all the boot and system files are there too, at the same partition? The way it is possible to do with W7/W8/W10, aka generalizing BCD first before cloning it from primary, then respecializing it to the destination logical partition where the image is restored (without need for things like editing partition tables or other tricks, because correctly respecialized BCD is the key, at least for Vista and later OS's).


Design & Applications principles of DR-DOS 7.03

$
0
0

I'm looking for some answers on Caldera's DR-DOS 7.03.
 

  • I'm looking for a graphical overview of the different process-states (queues) and  a brief explanation. 
  • Also looking for the exemplified composition of the Process Control Block with an overview of the data kept on each process and any statistics available thereby.
  • And also a description of the way in which the OS handles threads and an overview of the thread-states (queues) that are used.
  • And finally need the exemplified composition of the Thread Control Block.

Exclude drives from find output in Grub4DOS

$
0
0

Hi guys. For the sake of our discussion, say I have two operating systems: one installed on first fixed HDD, and one installed on my portable USB drive. I want to chainload bootmgr from the fixed drive using the find --set-root command.


For instance:

find --set-root /windows/boot/pcat/bootmgr

The above command will find my USB drive first and it will chainload to it rather than finding my fixed drive.

Is there someway to exclude my USB drive from the search? Or is there another possibility of doing what I need in a different way?


Thank you!

Universal HDD Image files for XP and Windows 7

$
0
0

================================================================================

*** IMG_XP package ***

Make XP and Win7 Universal Image files booting with Grub4dos Menu on HDD or USB

Download -  IMG_XP_85 - mirror


In Win7 OS Set User Account Control Off and Reboot

First Prepare XP Setup ISO file with integrated UpdatePack and DriverPacks as described below in section 2.
and Copy XP Setup ISO file to the root of internal harddisk drive of your computer.

1. VHD_XP_Create.exe - Make VHD file and Install XP in VHD by using Grub4dos Boot Menu on HDD

VHD_XP_Setup.png

0. Run IMG_XP.exe and Extract to simple path on your Local Harddisk - gives folder IMG_XP
1. Use IMX_XPmakebtimdiskinst.exe to Install ImDisk driver (if not present)
- Imdisk is used by USB_XP_Fix.exe to mount VHD and HDD Image files in a virtual drive
2. Run VHD_XP_Create.exe to create XP-1.vhd and Grub4dos Boot Menu for Install of XP in VHD

- Boot Drive - FAT32 or NTFS - can be USB-stick so that there are no changes needed in the Windows installation on the internal harddisk
- System Drive - NTFS - where VHD file is created e.g your internal harddisk drive
- XP Setup ISO file - located on internal harddisk drive so that fast loading into RAM is enabled
3. Reboot and in Grub4dos menu select Start XP Setup on XP-1.vhd - WinVBlock driver

- XP-1.vhd has already NTFS compressed format, so you should NOT format at Setup, just keep settings
- Format XP-1.img inside XP Setup cannot be used, it results in corrupt message
4. After Reboot select Continue XP Setup and then Reboot to Start XP from Image XP-1.vhd
5. Reduce size and improve settings as usual and Install missing Drivers but NOT the specific large Video driver
- Reduce size to get rid of pagefile.sys and hiberfil.sys via:
- right click My Computer > select Properties > Advanced > Change Virtual memory > select No pagefile and Set
- right click on Desktop > Screen Protection > Energy > Uncheck Sleep settings to get rid of hiberfil.sys
- Set System Restore and Windows Update Off and delete 350 MB of dllcache folder via cmd SFC /purgecache (or Run PURGE_DLLCACHE.BAT)
- In Device Manager Install missing Drivers but NOT the specific large Video driver
- For Universal XP don't Install the Video driver. You can Uninstall the Video driver so that you still have high resolution on any hardware.
- Set Screen Resolution to 1024 x 768 useful on all monitors (right click on Desktop)
7. Connect USB-HDD where you want to use XP Image, so that USB-HDD settings are known in XP registry, and Reboot
8. Reboot with other OS and copy XP-1.vhd to bootable USB-drive and create entry in Grub4dos menu.lst
- BOOT_USB.exe can be used to make USB-drive bootable with Grub4dos Menu - http://www.911cd.net...showtopic=24424
- BOOT_IMG.exe can be used to make Grub4dos Boot Menu on existing bootable drives
9. Run USB_XP_Fix.exe and Select your XP-1.vhd file on USB-drive and click GO
10. Reboot from USB on the same computer and Select Boot XP Image - XP-1.vhd - WinVBlock FILEDISK
11. Reboot from USB on other computers and Select Boot XP Image - XP-1.vhd - WinVBlock FILEDISK - to make Universal

When booting on other unknown machine, then XP will auto adjust itself in about 3 min and install the required drivers.
In this learning process, the registry gets extra info on how to boot on that machine and will use it next time and so XP becomes Universal.
This process requires that you have the WINDOWS\DriverPacks folder of 135 MB available with Chipset + Processor + MassStorage + LAN drivers
and that DevicePath in the registry was properly set by the Keep The Drivers Option KTD (see below and in Picture).

Thanks to Sha0 for making WinVBlock driver - http://reboot.pro/8168/
Thanks to cdob for making usb_xp_init.cmd - http://www.911cd.net...o...22473&st=37
Thanks to sara - pmedia for her tutorial - http://reboot.pro/13731/

More Info on direct Install of XP by using grub4dos menu and WinVBlock or FiraDisk driver:
cdob - Install XP from a ISO file No RAM disk - http://www.msfn.org/...rom-a-iso-file/
Doodoo - http://reboot.pro/13...385#entry122385
sara - pnedia - http://reboot.pro/13731/
wimb - http://www.911cd.net...showtopic=23553
karyonix - http://reboot.pro/88...737#entry121737
karyonix - http://reboot.pro/13967/


In case of a hidden boot partition containing Boot folder and file bootmgr of Windows 7,

then Grub4dos Boot menu for Install of XP in VHD can be made  by using USB-Stick as Target Boot Drive.
 

Grub4dos Menu for Install of XP in VHD by using XP Setup ISO file and WinVBlock driver


title Continue GUI-mode XP Setup on XP-1.vhd - WinVBlock driver - 2000 MB
find --set-root --ignore-floppies /XP3_1210W.iso
map --mem /XP3_1210W.iso (0xff)
find --set-root --ignore-floppies /XP-1.vhd
map --mem /winvblock.ima (fd1)
map --mem /winvblock.ima (fd0)
map /XP-1.vhd (hd0)
map --hook
root (hd0,0)
chainloader /ntldr
 
title Start -  TXT-mode XP Setup on XP-1.vhd - WinVBlock driver - 2000 MB
find --set-root --ignore-floppies /XP3_1210W.iso
map --mem /XP3_1210W.iso (0xff)
find --set-root --ignore-floppies /XP-1.vhd
map --mem /winvblock.ima (fd1)
map --mem /winvblock.ima (fd0)
map /XP-1.vhd (hd0)
map --hook
chainloader (0xff)
 
title Boot  Windows XP from Image - XP-1.vhd - WinVBlock driver - 2000 MB
find --set-root --ignore-floppies /XP-1.vhd
map /XP-1.vhd (hd0)
map --hook
root (hd0,0)
chainloader /ntldr


After Install of XP then you need to fix XP-1.vhd for booting from USB-drive by using USB_XP_Fix.exe
The fix will prevent BSOD 7B and will help to allow the XP VHD to boot on various hardware and so become Universal.

efb6ab99f77d04f8dc83bc2ed4588711b8886ea2

menu.lst on USB drive

title XP-2.vhd - WinVBlock FILEDISK - 2000 MB
# Sector-mapped disk
map /XP-2.vhd (hd0)
map --hook
root (hd0,0)
chainloader /ntldr

title XP-2.vhd - WinVBlock RAMDISK - 2000 MB
# Sector-mapped disk
map --mem /XP-2.vhd (hd0)
map --hook
root (hd0,0)
chainloader /ntldr

cheers.gif


================================================================================


Wait4UFD driver Enables Direct Install of XP in VHD on USB
Advantage of Direct Install of XP is that one does not need to make changes in the booting of the local harddisk,
where changes might be unwanted or difficult as in the case of a hidden Boot Manager partition e.g. Windows 7
 
First XP Setup ISO file was prepared as described in Section 2 here
DPsBase.exe was used to Integrate DriverPacks Chipset + Processor + MassStorage + LAN + WLAN
(settings Disc - Method 2 - GuiRunOnce - Enable KTD for the DriverPacks I will Select C+P+M+L)
 
 
1. IntegrateDrv was used to integrate Wait4UFD driver in the XP Setup Source directory containing folder i386
2. ImgBurn was used to make new XP Setup ISO file, that was copied to NTFS formatted active partition of USB-harddisk
3. VHD_XP_Create.exe was used to make 2 GB NTFS VHD on USB and to make Grub4dos Menu for WinVBlock driver
4. Boot with Grub4dos Menu from USB and Install XP in VHD using Start TXT-mode / Continue GUI-mode / Boot Windows XP VHD
5. After Install of XP then Run USB_XP_Fix.exe and Select your XP-1.vhd file on USB-drive and click GO
to make XP Universal for booting from USB connected to any computer.
 
================================================================================
 
2. How to prepare XP Setup Source ? - Prepare XP Setup ISO file with integrated UpdatePack and DriverPacks
 
Take care that your XPSOURCE Folder is located on your Harddisk in a simple Path without SPACES.
Copy the Content of your Windows XP Setup CD to your XPSOURCE Folder on Harddisk 
 
First Integrate ServicePack SP3 in your XP-SP2 Source (don't use here nLite).
 
In Command Window use for English version and XPSOURCE folder on drive E:
WindowsXP-KB936929-SP3-x86-ENU.exe /integrate:E:\XPSOURCE
Siginet's RyanVM Integrator 1.6 can then be used to Integrate Windows UpdatePacks in the XP-Source. 
Download preferred version RVM Integrator 1.6.1 Beta 2.1
 
Windows XP UpdatePacks and Addons:
Onepiece XP Post-SP3 AIO Update Pack FINAL - http://www.ryanvm.net/forum/viewtopic.php?t=6438
Onepiece XP Post-SP3 AIO International Update Packs FINAL - http://www.ryanvm.net/forum/viewtopic.php?t=10445
 
For Install of XP on a modern system with SATA Drives it is needed to use DPsBase.exe 
for Integrating in your XPSOURCE DriverPack Massstorage with TXT Mode Enabled.
In that case a lot of Extra RAID SCSI and SATA Drivers (about 120 extra) are Integrated which appear in the 
XP Setup BootFolder $WIN_NT$.~BT on Install-Drive and can prevent a lot of XP Install Boot Problems.
Use DPsBase.exe to Integrate DriverPacks Chipset + Processor + MassStorage + LAN + WLAN DriverPacks
which will then be located in OEM Folder in your XPSOURCE folder.
(settings Disc - Method 2 - GuiRunOnce - Enable KTD for the DriverPacks I will Select)
 
Always first use RyanVM Integrator and then use DPsBase to Improve your XP-Source
DPsBase makes presetup.cmd in folder I386 and changes the I386\winnt.sif file for use of DriverPacks
 
presetup.cmd in folder I386 will start decompression of DriverPacks located in OEM folder 
at the beginning of GUI-mode of XP Setup, which does NOT take to much time for the 5 DriverPacks
 
You should select to Keep The Drivers for Chipset + Processor + MassStorage + LAN
Then WINDOWS\DriverPacks is about 135 MB which is acceptable and provides a lot of extra driver support 
which is useful to make XP Universal and adapt easily to very different hardware.
In that case the DevicePath is set accordingly in key
HKEY_LOCAL_MACHINE\SOFTWARE\Microsoft\Windows\CurrentVersion 
so that XP can automatically make use of these drivers for adjusting to New Hardware
 
When you don't use nLite, you can copy the supplied $OEM$ folder to your XP Source folder
Change $OEM$ folder to your needs for UserAccounts and Registry Tweaks and Adding Drivers
CMDLINES.TXT is used for making UserAccounts and install of Registry Tweaks at T-12
 
Use DriverForge.v4.5.4.exe to Install from C:\Drivers at T-9 of GUI XP Setup (just for the last Reboot).
DriverForge.v4.5.4.exe was made by kickarse http://www.msfn.org/board/index.php?showtopic=110783
At end of TXT-mode XP Setup the folder $OEM$\$1\Drivers is copied to C:\Drivers
and $OEM$\$1\Install\DriverForge.v4.5.4.exe is copied to C:\Install
For Auto Use of DriverForge at T-9 add uncompressed driver folders in $OEM$\$1\Drivers
and Uncomment two rules by removing ; in winnt.sif file copied from winnt_sif to your I386 folder
This is very useful for Install of your well known Audio and Video driver during GUI-mode of XP Setup.


[SetupParams]

UserExecute = "%SystemDrive%\INSTALL\SetupPar.cmd"
 
Smart Driver Backup 2.12 of Jaque is very useful to Backup your drivers before install of XP
 
================================================================================
 
How to make XP Setup ISO File ?
 
- Use BBIE (see below) or Isobuster to Extract Boot Image bootsect.bin from Original bootable XP Setup CD 
  bbie will make image1.bin that you can copy as bootsect.bin to XP Setup source folder
- Reduce Size of XP Setup Source folder (if needed to fit on CD then remove folders LANG  WIN9XMIG  WIN9XUPG)
- Use ImgBurn and bootsect.bin to make Bootable CD
 
1. Remove 3 folders LANG  WIN9XMIG  WIN9XUPG - reduction in size = 135 MB
2. Run ImgBurn - Portable Tool in PStart Menu - IMG_XP\MULTI\PStart\Progs\ImgBurn
   - Select Write files/folders to disc
   - Output - Select Image File
   - Browse Source folder and Select your XP Setup Source folder
   - Browse Destination file - Give Name e.g. XP-Setup.iso
   - Labels ISO 9660 - Give Name e.g. XP-Setup
   - Advanced Restrictions - ISO9660 - Select Level X and DOS CharSet with 4x Checkbox On (allow ...)
   - Bootable Disc - Make Image bootable - Checkbox On - Browse Boot Image - Select bootsect.bin file
   - Bootable Disc - Emulation Type = None
                     Load Segment = 07C0
                     Sectors to Load = 4
 
BOOT_USB\makebt>bbie M:\XP3_1201.iso
BBIE - Bart's Boot Image Extractor v1.0, © 2001, Bart Lagerweij
will make BOOT_USB\makebt\image1.bin that you can rename as bootsect.bin
 
================================================================================
 
POST_FIX Tools for XP - Readme
 
You can use DriverForge.v4.5.4.exe to Install any missing driver (e.g. video audio or WLAN)
by selecting Path to Uncompressed Driver Files e.g. S:\D
 
In that case DevicePath in HKEY_LOCAL_MACHINE\SOFTWARE\Microsoft\Windows\CurrentVersion
is set to what DriverForge needs. 
It means that any previous settings are lost e.g. for making use of the KTP C:\WINDOWS\DriverPacks store.
 
If you have selected in DPsBase.exe to Keep The Drivers by using KTP Option,
then after using DriverForge you need to run DevicePath_Reset_KTP.reg to Reset DevicePath to the KTD settings. 
 
================================================================================
If you have Installed XP on AMD machine and then boot XP Image file on Intel machine,
then intelppm Service will have Start=1 value, which will give BSOD 7 E when booting on AMD machine.
This problem can be overcome by running the intelppm_Start3.reg registry tweak.
In that case intelppm Service will get Start=3 and everything will be OK for AMD and Intel.
================================================================================
 
Post Install Add DriverPacks to XP:
1. Boot with Universal XP Image file
2. Extract 3 DriverPacks to C:\ e.g. Chipset + CPU + MassStorage - will give C:\D folder
3. Use R-mouse to Open command prompt at C:\POST_FIX and run command
DevPath.exe %SystemDrive%\D
DevicePath in HKEY_LOCAL_MACHINE\SOFTWARE\Microsoft\Windows\CurrentVersion
is set to subfolders of C:\D
 
================================================================================
 
Portable Windows HD Image files booting from USB 
 
================================================================================
 
The Apps VHD_XP_Compact.exe and VHD_W7_Compact.exe of IMG_XP package
can be used to make Portable Windows VHD Image files booting with Grub4dos Menu on HDD or USB
 
These Virtual Harddisk VHD files require WinVBlock or FiraDisk driver to boot them as FILEDISK or as RAMDISK
The Ultimate Windows 7 VHD files make use of Microsoft VHD HBA driver which allows to boot them as FILEDISK
 
Target Boot Drive can be FAT32 or NTFS USB-drive used only for Boot files so that booting of internal harrddisk is NOT changed.
Target System Drive must be NTFS and is the drive where the VHD file is created and this can be your internal harddisk drive.
 
Booting from USB on computers with UEFI-firmware requires that the Boot Drive has FAT32 format.
 
Possible Scenario's 
- Boot with Grub4dos Menu on NTFS or FAT32 USB-Stick with VHD located on NTFS Drive of Internal Harddisk
- Boot with Portable USB-harddisk and launch VHD located on NTFS System Drive of USB-Harddisk
 
Booting VHD files from Grub4dos Menu as FILEDISK or as RAMDISK requires to Install in Source VHD either FiraDisk Or WinVBlock driver.
Additinally Installed Programs and Drivers and Settings are remembered in FILEDISK just like in normal Windows OS.
Loading the VHD into RAMDISK is much faster when the VHD file is located on the internal NTFS harddisk drive.
 
Source can be drive where Windows is installed or full XP VHD file Or Windows 7 VHD file
In case of using existing Installed XP as source, it is handy to first create a NEW user in XP,
so that this NEW user folder is small in size e.g. only contains very few Documents and Pictures.
 
Also Install either WinVBlock or FiraDisk driver:
- Install WinVBlock driver see - IMG_XP\Help_Info\WinVBlock_Install.txt
- Install FiraDisk driver with R-mouse on firadisk.inf in IMG_XP\makebt\firadisk-driver- folder
 
Reduce size and connect USB-harddisk as described in point 5 and 6 given above
to get rid of pagefile.sys and hiberfil.sys and to get USB-HDD settings are known in XP registry
 
After booting with other OS e.g. Portable 7 PE, then you can run VHD_XP_Compact.exe and Select the NEW user
to make XP Image file that can boot from grub4dos menu on HDD or USB
 
Mini XP = OS Size 200 MB - including WLAN + Audio + Printer + 7-Zip + ImDisk and all installed drivers
Portable XP = OS Size 600 MB - extra system32 complete + Windows Media Player - Multimedia support
 
In case of Mini XP then external VLC portable player can be used for MultiMedia support
 
Advised size of XP Image file is 1.2 GB and for Windows 7 VHD file is 2.0 GB.
 
VHD_XPC.png  == VHD_W7C.png
 
Grub4dos Menu for Win7-1.vhd and using FiraDisk driver


title Portable Win7-1.vhd - FiraDisk  FILEDISK - 2.0 GB
map --heads=2 --sectors-per-track=18 --mem (md)0x800+4 (99)
map /Win7-1.vhd (hd0)
map --hook
write (99) [FiraDisk]\nStartOptions=disk,vmem=find:/Win7-1.vhd,boot;\n\0
rootnoverify (hd0,0)
chainloader /bootmgr
map --status
pause Press any key . . .
 
title Port Win7-1.vhd - FiraDisk  RAMDISK  - 2.0 GB
find --set-root --ignore-floppies /Win7-1.vhd
map --mem /Win7-1.vhd (hd0)
map --hook
root (hd0,0)
chainloader /bootmgr


================================================================================
 

More Info see http://www.911cd.net/forums//index.php?showtopic=23553


3. Boot Win7 VHD Image file from USB
 

4. Universal Image Compact and Restore - Details
 

5. Solutions to prevent BSOD 7B - Run USB_XP_Fix.exe


6. Universal XP - Support in boot.ini menu for Multiple Hal and Kernel
 

================================================================================

Win_Restore.exe can be used to Restore XP or Win7 from VHD to HDD-partition.

For Restore of Win7 from VHD you need to run Win_Restore.exe in Win 7/8/7PE OS 

so that bcdboot.exe can be used to generate Boot Manager Menu required to boot Win 7 from HDD-partition.

- BOOT_IMG  makes GRUB4DOS Menu on Target Boot Drive for selected VHD File on NTFS Target System Drive (copy occurs if needed).

In general ImDisk must be installed in XP or Win 7/8 by using previously the provided imdiskinst.exe file.
ImDisk is used to mount VHD Image file in a virtual drive.
To Install ImDisk driver on Vista and Windows 7/8 you need to turn off UAC, User Account Control
http://www.ltr-data.se/opencode.html

The 64-bit FiraDisk driver requires in x64 Win7 to set  testsigning switched on.

Open Command Prompt as Administrator:

bcdedit /set testsigning on

Reboot to activate this. Info here http://msdn.microsof...y/dd419910.aspx

Thanks to karyonix, more Info see:
FiraDisk - http://reboot.pro/index.php?showtopic=8804

Install FiraDisk driver in XP with R-mouse on firadisk.inf in IMG_XP\makebt\firadisk-driver- folder


Development and historical thread here:
Thanks to joakim for starting the subject
http://reboot.pro/index.php?showtopic=9227

External hard disc not detected

$
0
0

Xboot does not detect external hard disc to create an external bootable disc. This problem is the same with windows 8.1 and windows 10. how can I fix it?

Painting Issue when CFileDialog run WinPE

$
0
0

I am facing an issue using CFileDialog in my code.

When I call the CFileDialog from ModalDialog, to select a file. My whole ModalDialog background gets erased once the current view is exited and reopened.

Procedure followed:

  1. Main Dialog

  2. Opened ModalDialog

  3. Opened CFileDialog for selecting file

  4. Exit ModalDialog

  5. Reopen ModalDialog [Background gets erased]

Note : This issue happens only WINPE environment and  if I select a file using CFlieDialog. If I click on Cancel in the CFileDialog. There is no issue. 


PFB, the code snippet of my CFileDialog use:

//This is the code to Open the DoModal dialog from MainWindow 
//
void CCommonDlg::OnBnClickedButton1()
{

COSDADlg dlg;
//m_pMainWnd = &dlg;
INT_PTR nResponse = dlg.DoModal();
if (nResponse == IDOK)
{

}
else if (nResponse == IDCANCEL)
{
// TODO: Place code here to handle when the dialog is
// dismissed with Cancel
}

}

// This is the code for open CFileDialog from ModalDialog to save file
//
void COSDADlg::OnBnClickedButton1()
{

CFileDialog dlgFile(FALSE);

CString fileName;
dlgFile.GetOFN().lpstrFile = fileName.GetBuffer(FILE_LIST_BUFFER_SIZE);
dlgFile.GetOFN().nMaxFile = FILE_LIST_BUFFER_SIZE;


INT_PTR nResult = dlgFile.DoModal();
fileName.ReleaseBuffer(); 

}

//This is the code to paint the background image for ModalDialog
//
void COSDADlg::OnPaint()
{
CPaintDC dc(this); // device context for painting

Graphics graph(dc.m_hDC);
CRect rt;
GetWindowRect(&rt);
graph.DrawImage(m_pImage, (INT)0, (INT)0, (INT)rt.Width() , (INT)rt.Height() );
DefWindowProc(WM_PAINT, (WPARAM)dc.m_hDC, (LPARAM)0);

}

It is not seems to be painting issue and it is related to winPE CFileDialog. It is working as expected When I run this code on my Windows 8.1 

x86 computer that's the size of a thumb drive - can run Android, Windows 8.1, and Linux

$
0
0

 mini PCs based on Intel's Atom SoC "APM-D01"

"APM-D01"


http://techreport.com/news/27228/this-mini-bay-trail-pc-is-the-size-of-a-thumb-drive

usb-atom.jpg

http://www.techspot.com/news/58480-bay-trail-powered-pc-no-bigger-than-usb.html

http://www.overclock.net/t/1519453/techreport-this-mini-bay-trail-pc-is-the-size-of-a-thumb-drive


The "APM-D01" measures only 3.9" x 1.5" x 0.38" (100 x 38 x 9.6 mm) and weighs just 1.6 oz (46 g), but its internals wouldn't look out of place inside a much larger tablet. The micro machine is available with a choice of quad-core Atom Z3735F or Z3735G processors from the Bay Trail generation. Both chips are clocked at 1.33GHz with a 1.83GHz burst frequency. The "F" is limited to 1GB of RAM at 5.3GB/s, while the "G" can address 2GB of memory at 10.6GB/s.

In addition to being available with different CPU-and-memory combos, the device comes with 16GB or 32GB of internal flash storage. Otherwise, all the versions have identical specs: one HDMI output (male), one Micro SD slot, dual Micro USB 2.0 ports, and both 802.11n and Bluetooth 4.0. I see what looks like a full-sized USB port on one edge, but it's not mentioned on the official product page. That page does, however, indicate that the system can run Android, Windows 8.1, and Linux.

Quad-core Bay Trail chips have enough pep for light desktop work, HTPC duties, and even casual gaming, so having one squeezed into something roughly the size of a Chromecast is pretty appealing. Similar ARM-based Android sticks do exist, of course, but they can't run Windows.

Unfortunately, getting your hands on one of these might prove problematic. Although the device is listed on Alibaba, it's only available in 500-unit quanties. At least the "US $1-70/piece" price range suggests the sticker should be low if these things eventually turn up stateside. Thanks to CNX Software for the tip.

unattended xml formated whole disk

$
0
0

Hai,

       I was trying to automate the windows installation with full format. But i ran it on backup system without remembering it. Now everything is gone with single partition. But already i had 3 partition. Which tool would be better to recover. I tried active partition recovery but it goes on scanning for long time without finding any. Plz suggest a solution which would recover quickly.


Thanks in advance...


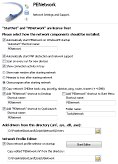
[script]PENetwork

$
0
0

Hi everybody,

here you can find the current information about my "PENetwork"-manager project - primary for LiveXP, Win7PE, Win8PE and Win10PE systems.

The current version you can always download from 'my' personal website (http://penetwork.bplaced.net).

At the moment the most time I'm writing on PENM itself.
However, some older WinBuilder scripts for LiveXP and VistaPE you can still find there.

If you have any questions, suggestions or problems just let me know.

Tested by others and me with Win10, Win8.1, Win7 / Vista / XP / W2K3-source and VMWare / VirtualBox / QEmu / RealWorld - thank you all very much :)

Greets...
Holger

Latest beta:

01.11.2016 (PENM 0.59 Beta 4)


Latest stable:
31.01.2014 (PENM 0.58.2):

- Changed: Recompiled with AutoIt3.3.0.0 to better work with virus scanners
No functional change!


Note!: network browsing doesn't work in QEMU by default cause of the buildin firewall

History:

Spoiler


Script-screenshot:
PENMScript-Mini.jpg

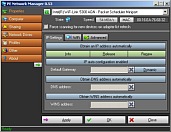
Screenshots of PENM at work:

Latest beta:

PENMCurrentBeta.gif


Latest stable:

PENMCurrent.gif

Dark color scheme:
PENM09-Mini.jpg
 

ISOStick semi-randomly drops to emergency mode

$
0
0

Hi,


my ISOSTICK will semi-randomly drop into emergency recovery mode, usually associated with having write enabled, but not always. Restoring firmware a few times from the isostick updater will bring it back.


It's a bit more reliable if it only sees Windows machines, it really hates Macs. It's been like this since day 1, in fact it spent a couple of years sitting in my drawer of "I'll get to it when I have time" because of this.


I've had this with multiple laptops, multiple OSen. It's had the same SanDisk 32GB Class 4 MicroSDHC card in it the whole time.


What information can I gather to help troubleshoot this?


Thanks,


yc

Boot CSM+UEFI with grub2?

$
0
0

Hi,

following some tutorials, i can make my pendrive to boot to WinPE with CSM or UEFI.

That's amazing because i can install all Windows version with the same pendrive.

The main problem, it's that I need to have some utilities that are in iso and i need to boot them too.

With bootmgr i can boot iso and img but only in CSM mode, but i need to boot them too in UEFI mode.

So i was thinking if is it possible to have grub2 to make my menus and boot UEFI or CSM and both menus having some iso or ima boot images.

Is it possible?

Thank you

Multiboot Toolkit for UEFI/Legacy Mode

$
0
0

Hi everyone,

MultibootUSB is my project to make USB become more multifunction. It is a gift for my friends. I was very happy when I received many good comments. Thank you for using this tool.

MultibootUSB is the open-source software, I use GNU license. You can download from my blog: https://niemtin007.blogspot.com/

This tool supports for USB Flash Driver and External Portable Hard Drives. With USB, it will be deleted all partitions and create new. With HDD box, it will be resized and create new partitions, so it very safe for your data.

MultibootUSB supports many modules, you can open ".modules.xls" to get the link to download. Copy all modules that you need in the root directory and run ".addmodules.bat" to add the modules. You can use WinSetupFromUSB to add Windows Setup for both UEFI/Legacy mode and use Yumiboot to add more modules for legacy mode
===============
How to install: https://www.youtube.com/watch?v=xkRGUbzCJBA
===============

If MultibootUSB does not work after installed on the External Portable Hard Drives. You can use the "CleanMBR.bat" to clean MBR on your drive. After run "CleanMBR.bat", your partitions will turn into unallocated, you need to use the recovery tool to recover all partition (trust me, your data will not be lost). You can use the recovery tools like AOMEI Partition or another software. Finally, remember to run ".fixboot.bat" to fix boot for the bootloader.
=================
How to Clean MBR: https://www.youtube.com/watch?v=PIt_7ywfgCg
=================

-----------------------------------------------------------------------------------------------------------
Thank to Ha Son, Anhdv, lethimaivi, Hoang Duch2... to help me build this project.

-----------------------------------------------------------------------------------------------------------


I will be very grateful if I get your feedback to make this tool becomes more complete, thanks.


Changelog MultibootUSB 1.0.5: (31-10-2016)

  • Build new installer to install MultibootUSB for External Portable Hard Drives (HDD box) with 1 click (create boot without data loss - very safe for your data)
  • Add WinPE Sergei Strelec like a module (UEFI/Legacy)
  • Update Grub2, Clover bootloader
  • Fix boot error when booting to Syslinux bootloader
  • Fix boot AndroidOS, PhoenixOS, CubLinux
  • Add password recovery tool for web browsers and wifi
  • Build new script for update MultibootUSB manually
  • Add boot live ISO Caine OS (Grub2 UEFI/Legacy mode)

fshare.png

  • MultibootUSB 1.0.5 (download) -- keep the original link if you want to share it, thanks!
  • Grub2 Themes for MultibootUSB (download)
  • WinSetupFromUSB (download)
  • YUMI boot (download) - MultibootUSB does not support for UEFI YUMI


DEMO


rEFInd boot manager - UEFI

niemtin007_2016.jpg


UEFI mode - Grub2

niemtin007_2016.jpg


Clover boot manager - UEFI

niemtin007_2016.jpg


Xorboot boot manager - UEFI

niemtin007_2016.jpg


Legacy mode - Grub2

niemtin007_2016.jpg

niemtin007_2016.jpg


Legacy mode - Syslinux

niemtin007_2016.jpg


Legacy mode - Grub4dos

niemtin007_2016.jpg

Clean USB after it is inserted to an infected computer

$
0
0

Hello


Say I insert a usb stick in an infected computer and want to make sure the stick is clean afterwards. Basically I want to use the stick in an infected computer and also use it on other computers without infecting them. All data on it is temporary so it does not matter if partitions/filesystems are wiped. Just need to make the stick is clean of all types of infections.


Would removing the filesystem off the drive suffice (like a diskpart clean operation) ?

What about if we are talking about a HDD, would removing the partitions suffice?


Thank you

Booting Super Grub2 Disk in UEFI mode using E2B

$
0
0

As in title.

I tried converting the .iso file to .imgPTN using the MPI Tool Pack but it doesn't work - when trying to boot in UEFI mode, it just skips right into booting Windows from my SSD.

Is there anything I have to do to make it work?

Compilation warning: newer DDK?

$
0
0

I got the following warning when compiling using Win 7.1 DDK.  Is this a security vulnerability?


338        if (NT_SUCCESS(status))
339        {
340            status = RtlCreateSecurityDescriptor(
341                event_security_descriptor,
342                SECURITY_DESCRIPTOR_REVISION);
343        }
344    
345        if (NT_SUCCESS(status))
346        {
347    #pragma warning(suppress: 6248)
--------------------------------------------------------------------------------
 PREfast analysis path begins  
 
 
348            status = RtlSetDaclSecurityDescriptor(  
   
         imdisk.cpp(348) : warning 6248: Setting a SECURITY_DESCRIPTOR's DACL to NULL will result in an unprotected object
Found in function 'DriverEntry'
348  
--------------------------------------------------------------------------------
 349                event_security_descriptor,
350                TRUE,
351                NULL,
352                FALSE);
353        }
354    
 
 
Also, has anyone tried recompiling to use Win10 SDK?  I started to reimport everything into a VS2015 solution/project scope.  I have most things compiling, although I'm getting an error with stdio.h
 
#error: Macro definition of vsnprintf conflicts with Standard Library function declaration.  
 
Does this mean stdio.h is broken in Windows 10 SDK?

Get Physical Drive number from Drive letter under WinPE

$
0
0

I wanted a way to get the drive number if the drive letter was known.

It has to work under minimal WinPE (with no WoW64 support) on both 32-bit and 64-bit Windows.

VB Script, WMIC or PowerShell cannot be used as it may not be present in a minimal or old WinPE version.

I could not find a native 64-bit utility, so I came up with this cmd script which uses FIND and DISKPART

@echo off
REM SteveSi www.easy2boot.com
REM Script to get Physical drive number from drive letter (32/64 bit WinPE)
if @%1@==@@ echo Please specify Drive Letter, e.g. "%~nx0 F:" & pause & goto :EOF
echo select volume %1 > dp.scr
echo list disk >> dp.scr
diskpart /s dp.scr > ss.txt
REM Find line marked with asterisk
find "* " ss.txt > ss1.txt
set DISK=
set D1=
set D2=
set D3=
REM allow for different languages, read 3rd line. For English 3rd param is disk number
REM Output will be * (word(s) for 'disk') number - e.g. * Disk 1  or * Disque 1 or * Datentrager 1
for /F "tokens=3,4,5 skip=2"  %%A in (ss1.txt) do set D1=%%A & set D2=%%B & set D3=%%C
REM C is 3rd character. If a number 0-99 then C will be undefined\empty
set C=%D3:~2,1%
if not "%D3%"=="" if not defined C set /a DISK=%D3%
set C=%D2:~2,1%
if not "%D2%"=="" if not defined C set /a DISK=%D2%
set C=%D1:~2,1%
if not "%D1%"==""  if not defined C set /a DISK=%D1%
if not "%DISK%"=="" echo %1 is on DISK %DISK% (environment variable DISK = %DISK%)
if "%DISK%"=="" echo ERROR: NO DISK NUMBER FOUND & pause
if exist dp.scr del dp.scr
if exist ss.txt del ss.txt
if exist ss1.txt del ss1.txt

This relies on the diskpart 'list drive' output 3rd, 4th or 5th word being the drive number.

I am unsure if this would work in all languages (e.g. Japanese or Chinese, etc.)


Could you please test it in every non-English language that you have and let me know if any problems?


e.g. save as test.cmd and then run under Windows or WinPE


test F:

or

test F

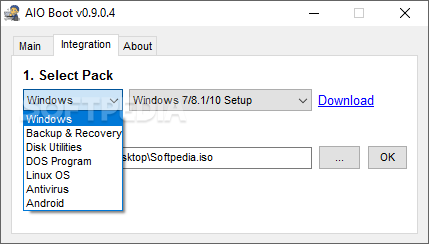
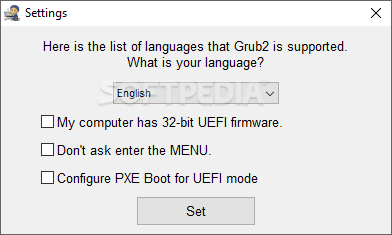
AIO Boot - Create a bootable USB drive or HDD with Grub2, Clover and Syslinux

$
0
0

About AIO Boot  

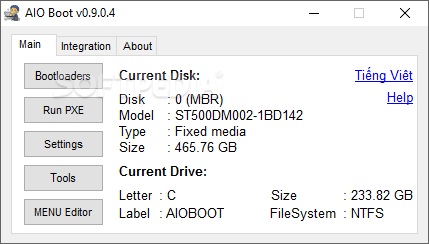
Create a bootable USB drive or HDD with Grub2 or Clover, and integrate multiple support packages, with this minimalistic utility
AIO Boot is a handy utility that enables you to create a bootable USB or disk drive with Grub2, Clover or Syslinux in a few simple steps. Additionally, it allows you to boot via LAN with Tiny PXE Server and iPXE, as well as integrate multiple operating systems or support programs.
 
All in all, AIO Boot is a useful application that enables you to create bootable USB drives, hard drives or even memory cards using Grub2, Clover or Syslinux. It features a minimalistic UI with neatly organized options.
 
Features
  • For Legacy-MBR: Grub2, Grub4dos, Syslinux and Clover [Legacy].
  • For UEFI-GPT: Grub2, Clover [UEFI] and rEFInd.
  • UEFI-GPT and MBR-Legacy.
  • Supports boot into Legacy mode for the hard disk in GPT style.
  • USB and HDD with FAT32/NTFS/exFAT format.
  • Boot via LAN with Tiny PXE Server.
  • One or multiple partitions, AIO Boot also supports hidden partition.
  • Support hotkeys for Grub2. At the main menu, if you want to boot into a certain menu, simply press their hot key. For example, to restart your computer, you simply press the "r" or "o" to shutdown.
  • Supports multiple languages, including Vietnamese, English, Russian and French...
  • Multiple sets of Windows setup files- XP, 2000, 2003, Vista, WIndows 7, Server 2008, Windows 8, Server 2012, both 32 and 64 bit versions are supported. Both BIOS and (U)EFI mode are supported.
  • Support to restore the Windows bootloader for both Legacy and UEFI mode.
  • Supports installing Windows 7 on a USB 3.0 port. This will help you resolve the error: A required CD/DVD drive device driver is missing. If you have a driver floppy disk, CD, DVD, or USB flash drive, please insert it now.
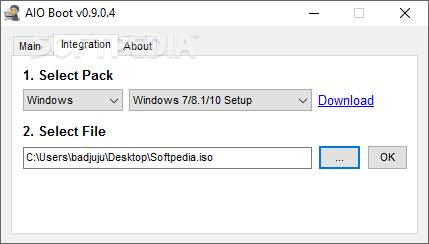
  • Support to integrate the following Package: Windows, Linux, Antivirus, DOS Programs, Android, Backup & Recovery, Disk Tools
  • Support to edit and delete the MENU (except for Windows packages).
  • Automatically identifies the DOS program to integrate.
  • Bypass the Secure Boot on the UEFI mode via Shimx64.efi (need tester). If your computer has a Secure Boot section, turn it on, then boot /EFI/Boot/shimx64.efi.

Download

Once you have downloaded the application, you need to select the drive where the necessary files should be extracted. This should be the bootable USB or HDD you wish to create. 


----------------------------------------------------------------------


File name AIO_Boot_Extractor.exe
Size 43,6 MB
Version 0.9.1.1
Last updated 08.11.2016
MD5 Checksum 8861724ce95475ffeabc06c2dc40e63d
 
Link to download:
 

----------------------------------------------------------------------


Softpedia guarantees that AIO Boot is 100% Clean, which means it does not contain any form of malware, including but not limited to: spyware, viruses, trojans and backdoors.

ScreenShot

aio-boot-v0.9.jpg

Clover-bootloader-cua-AIO-Boot.jpg

boot-qua-mang-lan.jpg

aio-boot_1.png

aio-boot_2.png

aio-boot_3.png

aio-boot_4.png

cai-dat-va-khoi-phuc-bootloader.jpg

chia-usb-thanh-2-o.jpg


Packages are supported


WinPE & Setup

  1. Windows 7/8.1/10 Setup
  2. Windows XP/2003 Setup
  3. WinPE 7/8.1/10
  4. WinPE XP

Linux OS:

  1. Auto Detect
  2. Ubuntu Desktop
  3. Linux Mint
  4. Parted Magic
  5. CentOS 7
  6. Red Hat Enterprise Linux
  7. Kali Linux
  8. Arch Linux
  9. WifiSlax
  10. System Rescue CD
  11. Debian Live
  12. Debian Installer
  13. Fedora Workstation
  14. Fedora Server
  15. elementary OS
  16. KNOPPIX Linux
  17. Manjaro
  18. DEFT-Zero
  19. Parrot Security OS
  20. Network Security Toolkit
  21. BackBox Linux
  22. Tails Live
  23. Solus Operating System
  24. Slackware
  25. Gentoo Minimal
  26. Slax Linux
  27. openSUSE LiveCDs/Rescue CD
  28. openSUSE Installer
  29. Clonezilla
  30. GParted
  31. Puppy Linux
  32. Lubuntu Desktop
  33. PCLinuxOS
  34. Antergos OS
  35. antiX OS
  36. Linux Lite
  37. LXLE OS
  38. Peppermint OS
  39. Zorin OS
  40. Simplicity Linux
  41. Black Lab Linux
  42. Cub Linux
  43. 3CX Phone System
  44. AbulÉdu
  45. APODIO
  46. AsteriskNOW
  47. AV Linux
  48. Baltix GNU/Linux
  49. Baruwa Enterprise Edition
  50. Berry Linux
  51. Bio-Linux
  52. BLAG
  53. BlankOn
  54. BlueOnyx
  55. Bodhi Linux
  56. BOSS GNU/Linux
  57. budgie-remix
  58. BunsenLabs Linux
  59. CAINE
  60. Caixa Mágica
  61. Canaima GNU/Linux
  62. ChaletOS
  63. Chapeau
  64. ClearOS
  65. Devuan GNU+Linux
  66. DuZeru
  67. Edubuntu
  68. Elastix
  69. Elive
  70. Emmabuntüs
  71. Exe GNU/Linux
  72. ExTiX
  73. eZeY
  74. Finnix
  75. GALPon MiniNo
  76. gNewSense
  77. Greenie Linux
  78. Grml
  79. Guadalinex
  80. HandyLinux
  81. Hanthana Linux
  82. Kaiana
  83. KANOTIX
  84. Karoshi
  85. KDE neon
  86. Korora
  87. Kubuntu
  88. KXStudio
  89. Leeenux
  90. LinEx
  91. Linpus Lite
  92. Linux Kodachi
  93. Linux Mangaka
  94. LinuxBBQ
  95. Linuxfx
  96. LliureX
  97. LuninuX OS
  98. Madrid_Linux
  99. MakuluLinux
  100. Maui Linux
  101. Metamorphose
  102. MX Linux
  103. Neptune
  104. NethServer
  105. Netrunner
  106. NexentaStor
  107. OB2D Linux
  108. OLPC OS
  109. Omoikane GNU/Linux
  110. OpenLX
  111. OpenMediaVault
  112. Openwall GNU/*/Linux
  113. OSMC
  114. Overclockix
  115. Pardus
  116. Parsix GNU/Linux
  117. Peach OSI
  118. Pearl Linux OS
  119. PelicanHPC
  120. Pinguy OS
  121. Point Linux
  122. PrimTux
  123. Proxmox
  124. Q4OS
  125. Qubes OS
  126. Raspbian
  127. RebeccaBlackOS
  128. Rebellin Linux
  129. Refracta
  130. REMnux
  131. Rescatux
  132. Resulinux
  133. Robolinux
  134. Rocks Cluster Distribution
  135. Rockstor
  136. Runtu
  137. SalentOS
  138. SELKS
  139. Semplice Linux
  140. siduction
  141. Skolelinux
  142. SME Server
  143. SolydX
  144. SparkyLinux
  145. Springdale Linux
  146. Stella
  147. SuliX
  148. SuperX
  149. Tanglu
  150. Trisquel GNU/Linux
  151. TurnKey Linux
  152. UberStudent
  153. Ubuntu GNOME
  154. Ubuntu Kylin
  155. Ubuntu MATE
  156. Ubuntu Studio
  157. Ubuntu*Pack
  158. Ulteo Application System
  159. Ultimate Edition
  160. Univention Corporate Server
  161. Untangle NG Firewall
  162. Uruk GNU/Linux
  163. Vinux
  164. Volumio
  165. Voyager Live
  166. VyOS
  167. wattOS
  168. Webconverger
  169. Whonix
  170. Window Maker Live
  171. Xubuntu
  172. ZevenOS
  173. Others

Antivirus:

  1. Kaspersky Rescue Disk
  2. Bitdefender Rescue CD
  3. Avira Rescue System
  4. ESET SysRescue Live
  5. Dr.Web LiveDisk
  6. AVG Rescue CD
  7. COMODO Resuce Disk
  8. Anvi Rescue Disk
  9. F-Secure Rescue CD

Backup & Recovery:

  1. Symantec Ghost
  2. Acronis True Image 2016-2017
  3. Acronis Backup Advanced Universal
  4. EaseUS Todo Backup
  5. AOMEI Backupper
  6. MiniTool Power Data Recovery
  7. R-Drive Image
  8. Acronis Snap Deploy 5
  9. Clonezilla
  10. System Rescue CD
  11. Redo Backup & Recovery
  12. Acronis True Image 2012-2015
  13. Acronis True Image 2011
  14. Acronis Snap Deploy 4

Disk utilities:

  1. MiniTool Partition Wizard
  2. Partition Guru
  3. Acronis Disk Director
  4. Paragon Hard Disk Manager
  5. Parted Magic
  6. GParted
  7. HDD Regenerator

Android:

  1. Remix OS [64-bit & 32-bit, UEFI & Legacy]
  2. Phoenix OS [64-bit & 32-bit, hỗ trợ UEFI & Legacy]
  3. Android-x86 [64-bit & 32-bit]

DOS Program:

  1. Auto Detect
  2. Symantec Ghost
  3. Partition Guru
  4. HDD Regenerator
  5. Active Boot Disk
  6. Active Password Changer
  7. Kon-Boot
  8. MemTest86
  9. Others.

Thank to all!

AIO Boot is constructed from a variety of sources, certainly still a lot of flaws, eager for sympathy. I would love to hear from you so that I can improve this tool better.

Let me know if you have any questions. Thanks!

Ramdisk benchmark vs real world speeds...

$
0
0

First of all, thanks to the creators/contributors of the awesome software. 


I build a new system and got plenty of ram on it. So, started looking at Ramdisk to see if I can speed up some programs.


I am using,

ImDisk version 2.0.9

Windows 10

32GB ramdisk  - NTFS,  64kb cluster size. 


I ran CrystalDiskMark on it and got pretty good speeds,

Rd  -   Seq: 5098  , Seq Q32: 4927 , 4K:819  , 4K Q32: 1025

Wr -    Seq: 8291  . Seq Q32: 9129 , 4K:600  , 4K Q32:  935


I then tried a simple copy speed tests,

1. ssd -> ramdisk 

2. ramdisk -> same ramdisk

3. one ramdisk  -> second ramdisk 


The max speed, according to windows, i got in any of the copy test was 1.2GB/s 

I am getting almost the low end of the benchmark numbers.


Is this in line with expectations? I am wondering if I did not set it up right.  Any suggestions?


Thanks

Grub4dos does not find files/folders in FAT32 volume

$
0
0

Hello,


I recently tried using Grub4dos within a FAT32 partition and I couldn't.

I tried several versions of Grub4dos, from 0.4.4 to latest 0.4.6 and the behavior was always the same.

So, the problem, as described in the title, is that when I try to find a file or folder within a FAT32 volume it always returns a "Error 15: File not found" message. For example:

grub> find /iso
Error 15
grub> ls (hd0,4)/iso
iso
grub > geometry (hd0)
drive 0x80(LBA): C/H/S=7832/255/63, Sector Count/Size=125821080/512
  Partition num: 0, active, Filesystem type is ntfs, partition type 0x07
  Partition num: 1,  Filesystem type is ntfs, partition type 0x07
  Partition num: 4,  Filesystem type is fat32, partition type 0x0B
I have formatted the FAT32 partition using MiniTool Partition Wizard Free 9.1 (ISO), but I also tried deleting the partition and reformatting it under Windows 10. In both cases the same happens, Grub4dos "find" command does not find files or folders. If I format in NTFS then everything works great. 
 
This is quite odd and I couldn't find any info on a similar issue.
I would appreciate suggestions as to why this is happening. I can live without FAT32 but it's so weird that I would like to get to the bottom of it.
 
Thanks!

Grub4dos HELP ME PLEASE it's dead

$
0
0
Somehow my kid screwed up my computer. All i get is a command prompt GRUB> all i want to do is get into my computer and have no clue what to do. Can someone please please help me.....
Viewing all 6812 articles
Browse latest View live


Latest Images