Sometimes a little hack has some real genius in it  :
:
http://www.instructables.com/id/Cassette-MP3-Player/?ALLSTEPS

Wonko
Sometimes a little hack has some real genius in it :
http://www.instructables.com/id/Cassette-MP3-Player/?ALLSTEPS
Wonko
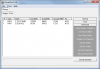
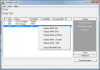
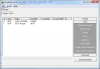
Hello Gents,
I made a small freeware app that allows one to clone a drive (physical or logical) to/from another drive or image.
On top of that the tool can :
-save/restore the MBR or BS,
-delete the layout of the drive,
-wipe with 0's,
-create a raw image file,
-make a vmdk/vhd from a raw image file to boot your cloned disk in vmware,
-do various operations on the registry around booting,
-format any device to fat16/fat32/ntfs/exfat/udf (includig usb pen),
-read faulty devices (with bad sectors for instance),
-perform speed tests,
-edit the partition table, view the boot sector ,
-create a disk, create a partition,
-extend / shrink a volume.
Tool can be downloaded here or here
There are plenty of other tools (and possibly better) that can do the same.
What I was looking for was a GUI (no command line tool), merging several functionalities at once and free.
Feedback and requests welcome 
Regards,
Erwan.
Some are old but just saw them and had me watching all of it.
Poor cat, the guy with helmic, dog poo, air plane, the doctor, the wife and mother in law, the daughter, guy trying to get change and the last one. 
Hello Everyone.......
I am using Dual Boot (WIMBoot + VHDX) of 'Win 10 TP' in my system. And everything is working just perfect except 'Hibernate and Sleep'. I can not compromise with 'Hibernate' features because I rarely shutdown my PC in a Week.
Is there any Way/Trick/Hack/Tweak by which I can enable 'Hibernate' in case of Dual VHD Booting ?
Is it possible to have common 'pagefile.sys' and 'hiberfill.sys' in the root of partition which contains VHDX files ?
/BOOTMGR
/Boot/BCD
/Win 10 TP.vhdx
/Win X TP.vhdx
/install.wim
/BOOTNXT
/pagefile.sys
/hiberfill.sys
Is it possible to implement above configuration ? If 'Yes', then Will it enable 'Hibernate' in Dual VHD Booting ?
Please feel free to suggest me any other alternative (if possible) in order to enable 'Hibernate' in Dual VHD Booting..
Thanks & Regards....
I have just gotten a new laptop, Windows 8.1 64 bit with UEFI boot on a GPT disk. For YEARS now I've backed up and restored my MBR legacy PCs with a personally made Windows PE and Ghost32. This no longer works. What works with the UEFI / GPT and will reliably backup and restore the OS on a 64 bit OS? I tried AOEMI which seems to support it but can't get it to work. As a test I installed a spare disk and then installed Windows 64 using UEFI / GPT and then used AOMEI to back it up. It backs up fine but if I test it by simulating a complete disk failure (or a NEW disk) by blowing off ALL the partitions it will restore and NOT boot and come to the Windows error screen. I've tried to let Win 8.1 repair the disk from the DVD OS install but it fails. Does anyone have a WORKING OS backup utility they can recommend? At this point I am seriously considering just getting another copy of 8.1 and install it in legacy / MBR mode and use it instead of the stock UEFI / GPT mode. It's only a 1tb disk, so there is no issue with legacy boot on it.
 Cool WInFE work done by Jeffrey A. Cunningham, Sr Digital Forensic Examiner, US Army (ChiefCham), on imaging a Surface Pro using a bootable UEFI WinFE. It is certainly neat to see this type of testing and research done on ANY forensic tool where the results can be shared with everyone.
Thanks ChiefCham!
Image a Surface Pro using bootable UEFI WINFE
Cool WInFE work done by Jeffrey A. Cunningham, Sr Digital Forensic Examiner, US Army (ChiefCham), on imaging a Surface Pro using a bootable UEFI WinFE. It is certainly neat to see this type of testing and research done on ANY forensic tool where the results can be shared with everyone.
Thanks ChiefCham!
Image a Surface Pro using bootable UEFI WINFE
install ?Go ahead and try them all as you wish.
installTo install something, you can for example try:
install win7pe---------------------
Hi,
im trying to integrate multiple network drivers for different hardware into my win7pe image. I tried to integrate them via the "add drivers" option of PEnetwork and also with the "driver integration" of win7pese. Unfortunately it is not possible to integrate all the drivers at the same time. If i integrate an intel nic driver "Network_Driver_DGHKG_WN_18.7.0.0_A05.EXE" for "Intel I2xx/825xx 10/100/1000 Ethernet" it is not possible to operate other network hardware properly. I'm always getting the error, that "there is still another driver loaded and windows needs to be rebootet". So in fact windows loads the "wrong" driver first and after that finds the "right" driver and loads it, but fails to start the device properly.
Is there any proper way to integrate multiple drivers into pe or dynamically load those drivers at system boot?
Thanks for your help
i am doing some tests with NTlite and to save my install and check that tool , i used Disk2vhd .
i used it to backup a 60 Go ssd with win7
it created me a 7.20 GB (7,742,602,240 bytes) file in few minutes , i found that so incredible that i created a 60 Go vhd using disk management console and made a copy of my partition with a backup tool in this 60 Go vhd
i used 7z 9.34 to compress it uzing 7z-lzma2 setting , after 90 minutes or so , the resulting file is 13.0 GB (13,991,225,093 bytes)...

i am asking if any grub4dos can handle these vhds ? and the vhdx format ? and if it can read the boot partition of 100 Mo that windows wants to format ?
as far as i know , i think it can not load in ram this vhd , but may be it will....
that could be nice to map the file and add a parameter for "free space" :
with an example pc has 16 Go of ram so it loads at boots the file of 7.20 Go and take 2.80 of ram for free space so hard-disk will be 29 Go + 2.8 = 32 Go for windows and not 60 Go

that could be great ;'] , may be scsi-windows drivers like firadisk should be updated too ...
at least that would help to have and save a lot of programs instead of shrinking them a lot for the vhd file to be loadable in ram
mini PCs based on Intel's Atom SoC "APM-D01"
"APM-D01"
http://techreport.com/news/27228/this-mini-bay-trail-pc-is-the-size-of-a-thumb-drive

http://www.techspot.com/news/58480-bay-trail-powered-pc-no-bigger-than-usb.html
http://www.overclock.net/t/1519453/techreport-this-mini-bay-trail-pc-is-the-size-of-a-thumb-drive
The "APM-D01" measures only 3.9" x 1.5" x 0.38" (100 x 38 x 9.6 mm) and weighs just 1.6 oz (46 g), but its internals wouldn't look out of place inside a much larger tablet. The micro machine is available with a choice of quad-core Atom Z3735F or Z3735G processors from the Bay Trail generation. Both chips are clocked at 1.33GHz with a 1.83GHz burst frequency. The "F" is limited to 1GB of RAM at 5.3GB/s, while the "G" can address 2GB of memory at 10.6GB/s.
In addition to being available with different CPU-and-memory combos, the device comes with 16GB or 32GB of internal flash storage. Otherwise, all the versions have identical specs: one HDMI output (male), one Micro SD slot, dual Micro USB 2.0 ports, and both 802.11n and Bluetooth 4.0. I see what looks like a full-sized USB port on one edge, but it's not mentioned on the official product page. That page does, however, indicate that the system can run Android, Windows 8.1, and Linux.
Quad-core Bay Trail chips have enough pep for light desktop work, HTPC duties, and even casual gaming, so having one squeezed into something roughly the size of a Chromecast is pretty appealing. Similar ARM-based Android sticks do exist, of course, but they can't run Windows.
Unfortunately, getting your hands on one of these might prove problematic. Although the device is listed on Alibaba, it's only available in 500-unit quanties. At least the "US $1-70/piece" price range suggests the sticker should be low if these things eventually turn up stateside. Thanks to CNX Software for the tip.
Since some time, Google attempts to retrieve a date in the web pages to show whether the page is old or not.
But when I make a search with, for instance, "ImDisk Toolkit", which has been updated some days ago, Google displays the date of initial release in 2013, likely because this is the first date it sees in the page. Some people might think that the software was never updated.
Moreover, I think the date of the last update is more important than the date of a release that is no longer available since a long time.
I don't know if this can be changed easily, but I think it would be nice to have the date of last release in first.
HELLO! 
This tutorial is for those of you who always wanted a truly multiboot USB disk. This will show you how to create a disk with 2 partitions - one for storage and one for booting various installers or bootable distributions. The second partition will be hidden and therefore will not show up in Windows when you plug your disk in (this is done to ensure nothing messes with those boot files). You will be able to stuff as many installers for anything as your disk allows  (no limitations like 'only 1 Windows installer' and such).
GOALS 
NOTE:
If you also have SanDisk Extreme USB stick (or other similar with removable bit set to 0), this will also work for you since it is detected as disk. I am not sure whether or not this will work for simple removable=1 USB sticks (canonical USB flash drives or USB sticks).
Performing this tutorial will erase all data and all partitions on your disk. Back everything up before proceeding.
You perform this tutorial at YOUR OWN RISK. I am not responsible for what happens to your hardware or data. To decrease the likelihood of bad things happening, make sure to read all the instructions carefully.
Still with me? Let's get GOING! 
SOFTWARE 
First of all: you need a PC with Windows 7/8 and administrative access to it (Vista may work, not sure). This is where the tutorial will be performed.
To perform all that we will need this software package. [0] (from now on, references will be marked with []). To download it, you may need to register (not sure why).
The software package includes:
Additionally, you need to download the following:
Optionally (the software I recommend which will make the process easier and more flexible but is not required):
And of course a few Windows installer .isos as well as few bootable Linux distributions.Those could be anything that YUMI and SYSLINUX support (you'll be able to check that out later in this tutorial).
When you download all this, you are ready for next steps.
CONCEPT 
Here, the scheme of operation will be briefly discussed.
ACTION 
WinSetupFromUSB was set up successfully, you can delete that folder.
Now it's time to run 'start_admin.cmd'.
Press any key to continue...
1.4. Just like it says, press any key to close the window. Do not run start_admin.cmd yet. Go over to the next step to define partition structure.
MENU LABEL Windows Installers/Recoveries >>>
MENU INDENT 1 KERNEL chain.c32
APPEND fs ntldr=/bootmgr
Preferably, add an empty newline before and after this code. Adjust the menu entry label if you wish. Save and close the file.
\boot
\efi
\multiboot
\WINSETUP
\bootmgr
6.3. The following files and folders can be safely deleted:
\.disk
\default
\grldr
\menu.lst
\plpbt.bin
\shifthd.bat
\usbdrive.tag
Remove them at will. Additionally, Windows may create its stupid System Volume Information - you can remove that too if you're lucky.
Also, this is the point where you may rename your boot partition from MULTIBOOT to any other name (I prefer simply Boot). You can do that just like with any folder through Windows explorer.
Also, I prefer to keep vmount program ([3] in SOFTWARE section) to be able to quickly mount hidden partition under Windows if I need to.
That's pretty much it, if you notice any misconception or error, feel free to post it here. Also, questions and feedback are welcome.
Wonko, erwan.l, ilko, Steve - members of reboot.pro community who helped me tremendously in this thread. This is where the journey ended
Bob who initially hinted about ImDisk driver in this room.
Mario who educated about the BCD files, their purpose and means to edit them in this original question. This is where the journey started.
Run Windows 7 (and other NT 6.x versions of Windows) from Grub4Dos's RamDisk
UPDATED 18.04.2013
Covers installing Windows 7 to VHD, installing and configuring Grub4Dos, installing FiRaDisk driver.
Finally, describes loading VHD image into RAM and booting it.
New, refined videoguide... including x64 instructions and some corrections...
Combined with an updated guide here
http://tech.outcult.com/tutorials/winram/01/
it's now sort of interactive 
Download guide files here.
I need to setup a password protection before using the Win7PE build by WinBuilder [080], I tried to use this script used this version replaced the embedded one: http://www.911cd.net/forums//index.php?showtopic=19736&st=0, however, it will got bluescreen after I type password in the PreLogon screen.
I tend to use ExplorerShell but no matter cmd.exe or winpeshl.exe inside the PreLogon.ini, I would get BSOD..


 (sorry for Paint, graphics design isn't really my strong side):


